Step by Step: Cleopatra Testing Poisons on Condemned Prisoners
By Jim DeRogatis
I was inspired to start this box after stumbling across this painting by the French artist Alexandre Cabanel on the Net: Cleopatra Testing Poisons on Condemned Prisoners (1887). Best known for The Birth of Venus (1863), something about this image by Cabanel struck me, and when thinking about turning it into a box diorama, step one was reversing it so that the queen, the most important figure, would be at “stage left,” because, as Shep observed when I showed it to him, “People scan from left to right, and she should be the first thing you see.” As you can tell from subsequent images and the finished piece, I took a lot of liberties with my design from here, all based on extensive research on the Web, in books, and via picking the brain of Katie Cobb, daughter of MMSI stalwart Mike Cobb; she recently completed an advanced degree in Egyptology. Everything starts with research, research, research!
Step two in any box diorama is playing around with positioning—it’s crucial to have a solid idea of where the figures will go and the size of the space you’ll be depicting before you do anything! Here, sculpting already is underway on the figures (I failed to take earlier shots), but sculpting got underway early in any event because I used three stock castings. The queen and the girl with the fan were from Pegaso and the reclining girl was an African figure from Phoenix, all between 75 and 80mm; the other figures I had to scratchbuild, and this was my first attempt at creating figures from nothing. In the past, I have started the crucial positioning stage either with rough styrene figures (generally Historex) or with wire stick figures; these later provide the armatures for scratchbuilt figures (and that’s how the prisoner on his knees, the “witch”/old lady administering the poisons, and the guard hauling the dead prisoner all started). Here, some wood dowels fill in for the pillars. As you can see, I was shooting for a semi-circular layout from the start.
The white metal Pegaso and Phoenix figures all were extensively modified, as you can see here, with the heads and limbs repositioned, the hair cut and filed off, and even, in the case of the incredibly bosomy Phoenix African, a Dremel mastectomy carefully undertaken to bring the proportions closer to something more realistic!


Here are two shots of my scratch figures in progress. The green putty over wire is Kneadtite/Duro mixed in equal proportions with Aves epoxy putty, which I find easier to work with than that old standby, A+B.
Throughout the project, you want to constantly keep checking your positioning and tweaking your layout. In this case, it was all about the figures, so I have not built any walls or permanent pillars yet. I just kept playing with the figures on a temporary white Styrofoam base, continually checking my sight lines. In other cases, where you have fixed dimensions for a room or a scene, you may start building the permanent setting and scenery much earlier, at the stick-figure stage. Whatever your approach, building the figures in harmony with the scene is essential; you are trying here to create an integrated whole, which is different, perhaps, than creating an attractive figure or model and later putting it in a diorama setting.
The girl with the fan is nearly done at this point. As you can see, based on my research, I added a lot of clothing to what essentially had been a naked woman, in part because court dress in the age of Cleopatra called for it (and it was more Greek than Egyptian); partly for the sake of modesty (viewers of all ages will see your work at shows); part because I consider myself a feminist and find the cartoonish proportions of many female figures ridiculous if not offensice, and finally because I wanted the challenge of painting diaphanous clothing (which I hoped would wind up being sexier than naked women—I’m not all that feminist!).
Cleopatra midway through the sculpting. It would take three or four tries to get the drapery of her gown right in the confines of that chair and around her casual yet regale pose, which I wound up changing some but not entirely from the original casting.
The near-finished, formerly African reclining woman. Her hair was a challenge: I removed all of it from the original white-metal casting, carved grooved notches in what was left of her head, and carefully laid in twisted thin solder braids to create her hairdo. I also worked a lot on her face (and that of the fanning girl) to change the expressions, though that came later as the necessity became obvious when checking the layout (and re-checking, and re-checking). You’ll also notice, as mentioned earlier, that the reclining woman has gone down a few cup sizes—now she’s merely a “D”!
My scratched guard and prisoner near completion. Getting the angle of the guard as he dragged the heavy weight of the dead body, the lay of the dead prisoner, and the connection points of the wrists and ankles took a lot of playing around. The guard’s hands were sculpted on the dead prisoner’s ankles, and wires from the prisoner’s feet were pinned into the guard’s arms. I also failed to make the guard beefy enough at first, so he kept gaining muscle mass as I got valuable feedback on the anatomy and positioning from Shep and Joe Berton.


Here are the painted prisoner and guard.
The old woman was a challenging paint, as I tried several color schemes before settling on the one that worked best. It was Joe’s idea to add the Egyptian motifs adorning her garments to make her scream “Egypt!” a little louder. Prior to that, she sort of looked like a hooded witch who could have come from Salem, the Middle Ages, or a Halloween party.
Well before painting the figures, I settled on the design of my “room,” presumably a chamber in the larger palace, curtained off for privacy for these evil doings. I wanted the wall behind the queen to be solid and adorned with Egyptian art, some of it suggested by Katie Cobb (though the cow god is a tribute to Shep). I tried a lot of different ways to do the wall and the art on the pillars before settling on scanning and scaling the images I wanted, printing them out as black line drawings on clear decal paper, applying them to the wall and pillars, and painting them. The hieroglyphics on the pillars, by the way, spell out “Thanks to…” with the names of people like Joe, Shep, Katie, Mike, Barry Biediger, and my wife Carmel, all of whom offered invaluable advice and assistance.

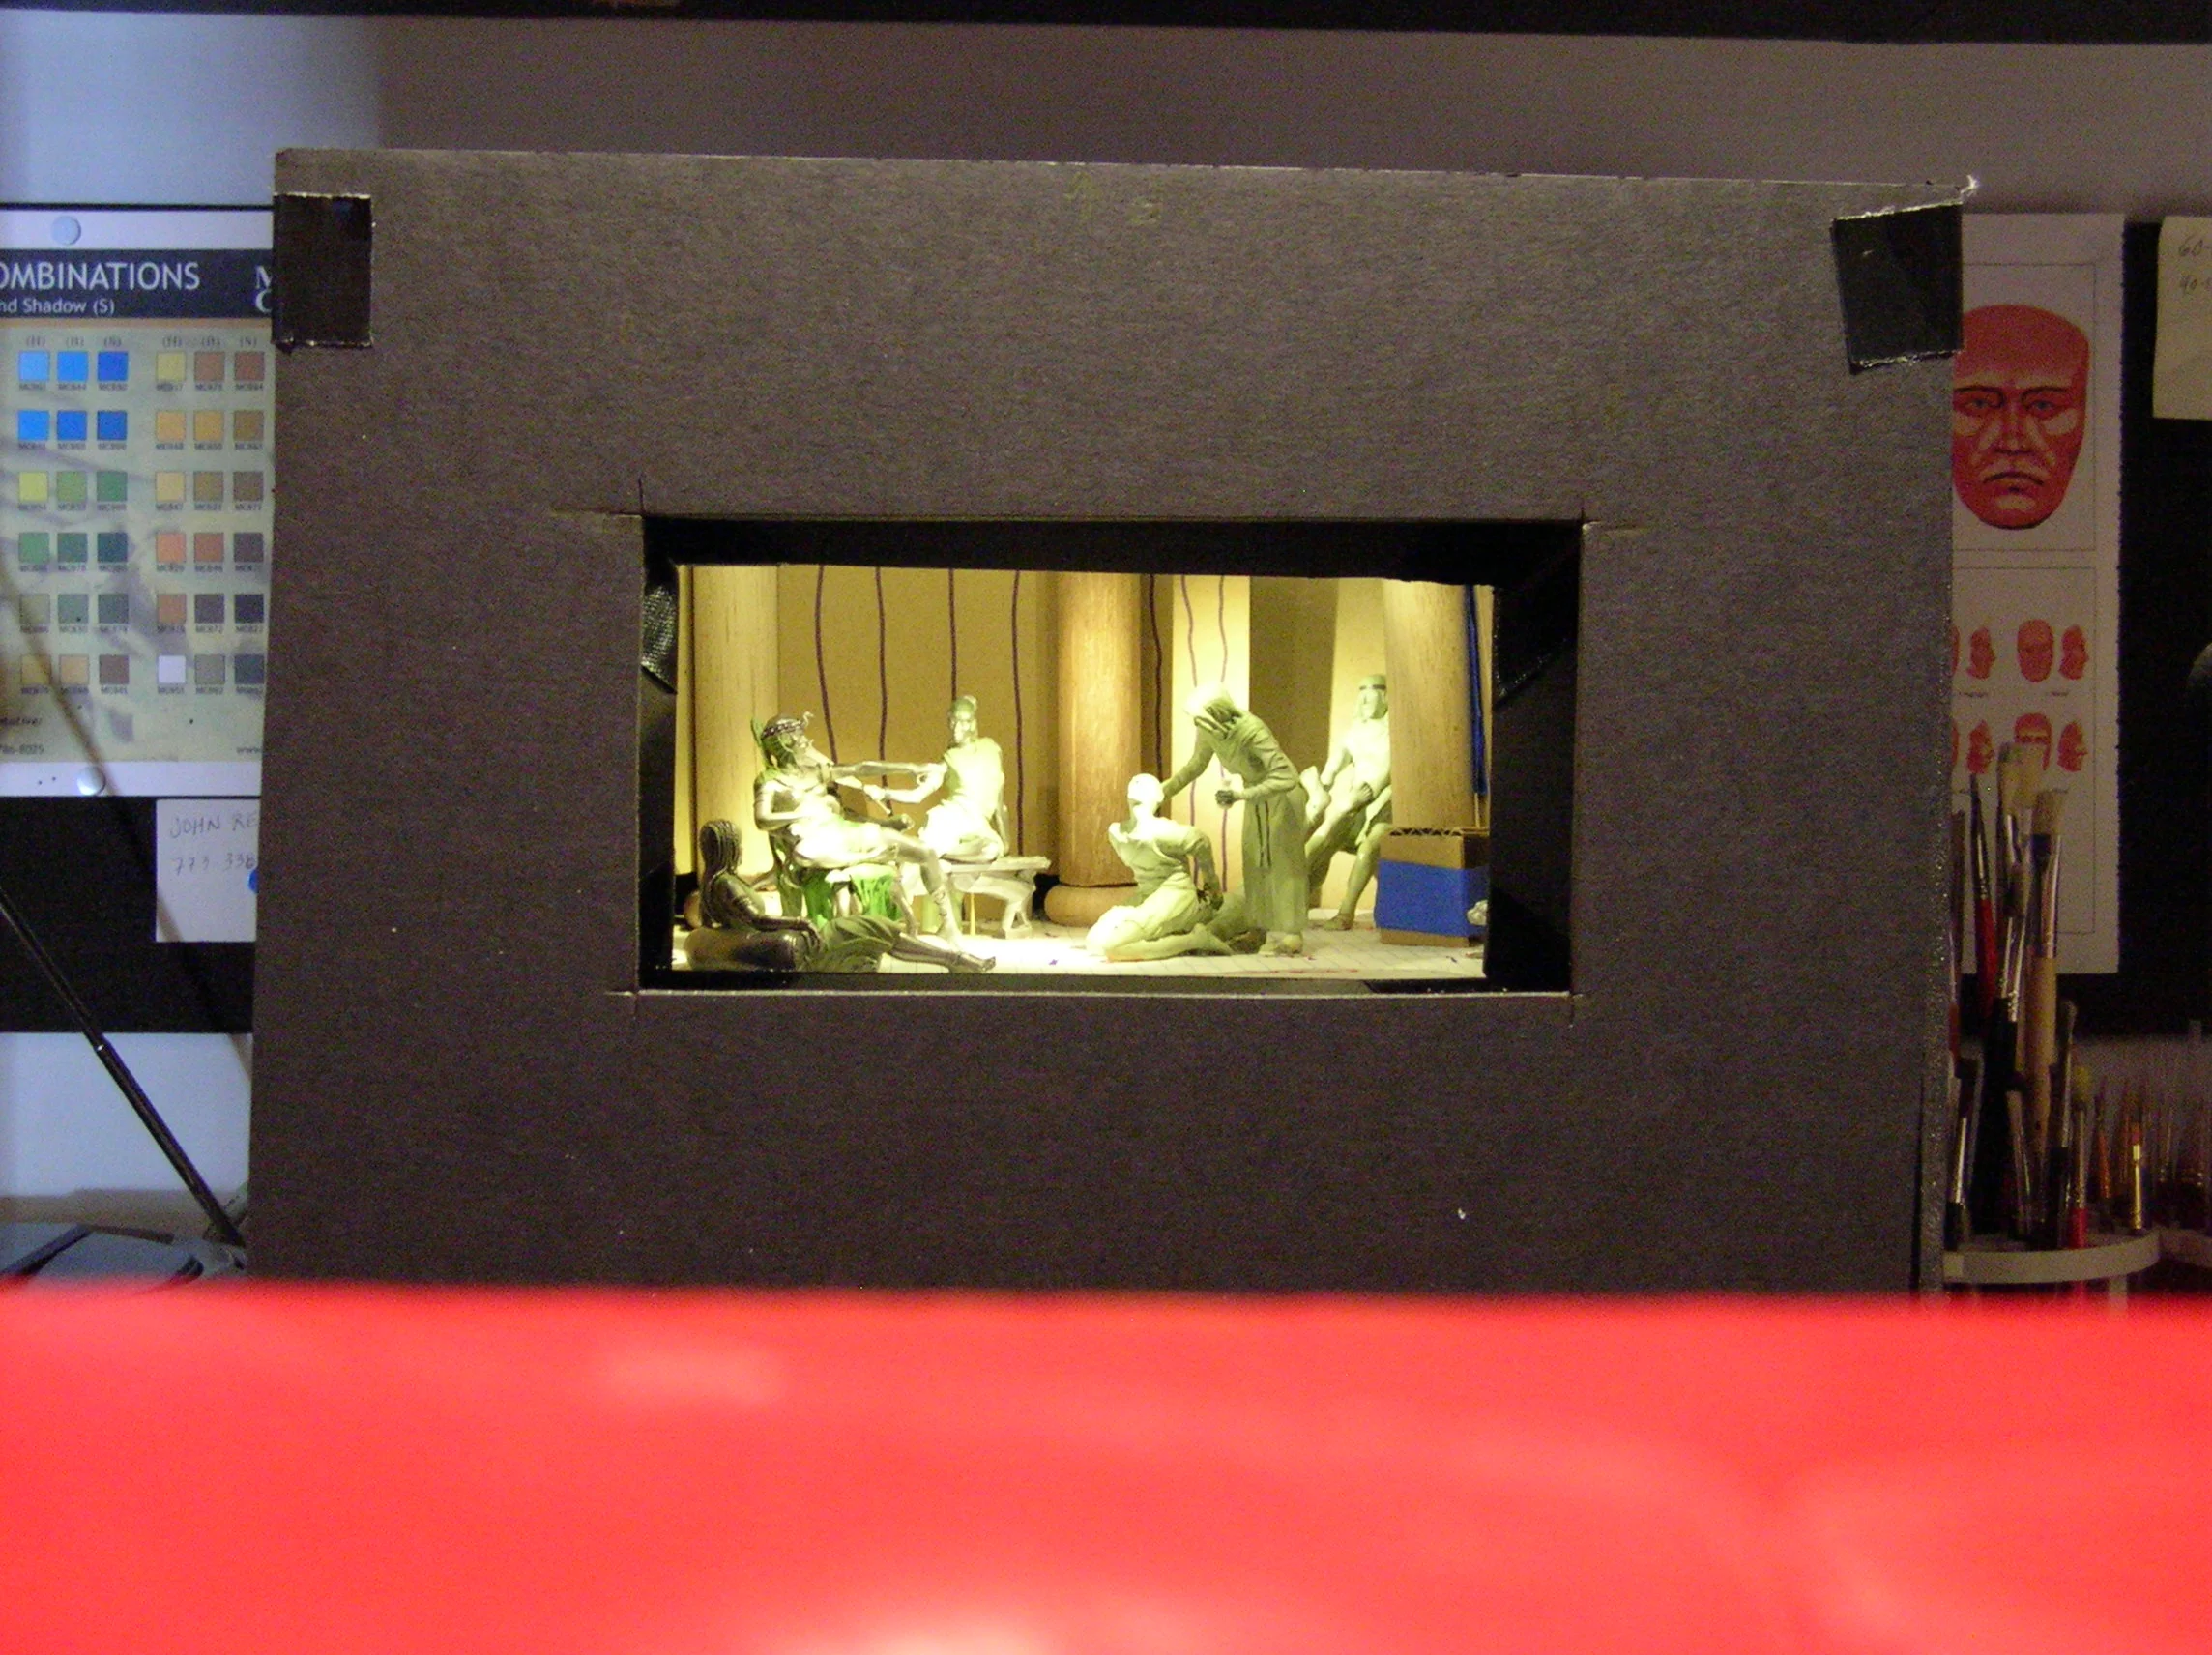
At some point in each box diorama project, I like to build a “mock box” out of foamcore to check the dimensions I’ll need for the finished box, really nail my sight lines, and begin to play with the lighting. I keep this beside the work bench and slide the temporary Styrofoam tray, and later the permanent tray or base, in and out all the time, checking my work and how the whole box is shaping up as often as possible. As Shep always says, one of the great time-savers with box dioramas is that you don’t have to spend a lot of time sculpting or painting detail that will not be seen. But you won’t know what will be seen unless you build a box pretty close to what you’re going to end up with! Needless to say, you need a mock reveal to go with your mock box, and I’m checking the sightlines through that in the second photo. This temporary box worked just fine through about 70 percent of the project, until it was replaced with…


The permanent box, built out of half-inch plywood (quarter-inch is fine, too, but I find it easier to make a squarer box with heavier wood). In the second shot you see the box with the frame test-fitted in place. The frames for all of my boxes have been built at a small shop in Chicago that does great work called April 7’s Custom Framing. I’ve often brought the box in to show the owner Martin exactly what I need and to give him the vibe of the project, and he always exceeds my expectations. For this one, I wanted something vaguely Egyptian, and he came through as always. (Frames do not have to be this elaborate or expensive, and certainly you can make them yourself; at some point, we’ll tap home-framing expert Joe Berton to tell us how that is done. You do not, however, want to base your box diorama on a pre-existing or store-bought frame, letting that dictate the size of your piece; the scene inside needs to be the factor that sets all of your dimensions!)
Here, the painting is done, and the scene really is coming together. The curtains are made over a thin plywood form with various-sized wooden dowels glued on and A+B putty applied over that and smoothed out as much as possible. In this shot, you also can see the palm trees I added outside the curtain in the far-right corner, barely discernable in the finished box, but something was needed there to add to the illusion of the scene continuing beyond the box dimensions. (Behind the tress, the walls of the box are lined with black velvet, which is the box diorama builder’s best friend for creating the illusion of night and infinity, as it makes any stray room light almost completely disappear.) In my imagination, the queen’s curtained chamber of horrors opens up to a courtyard in the center of the palace. The historians can’t say I’m wrong, since Cleopatra’s palace never has been found! (Some believe it is underwater off Alexandria.)
Nearing completion (I should perhaps note here that the entire diorama took about nine months), in this shot, I am tweaking the positioning of the overhead lights, all Evans Designs warm white LEDs. (You’ll read a lot more about those elsewhere on the site.) I've put the box inside a mail bin to cut out the room light as much as possible and see what my LEDs really were doing.


I love the photo Bob Sarnowski took of the finished box (below), but my quick and dirty close-ups show a few different perspectives and more of some of the details, including the tiger peaking out of the curtain (it came with the Phoenix African, and I modified it some to look more curious than menacing) and the elaborate table with mortar and pestle for mixing the poisons (that was a dollhouse piece, cut down to size and modified).
(Photo by Bob Sarnowski)
I am proud to say this diorama won a bronze medal at the Swiss World Expo in Montreux and a silver medal at the MMSI Chicago Show in 2011.