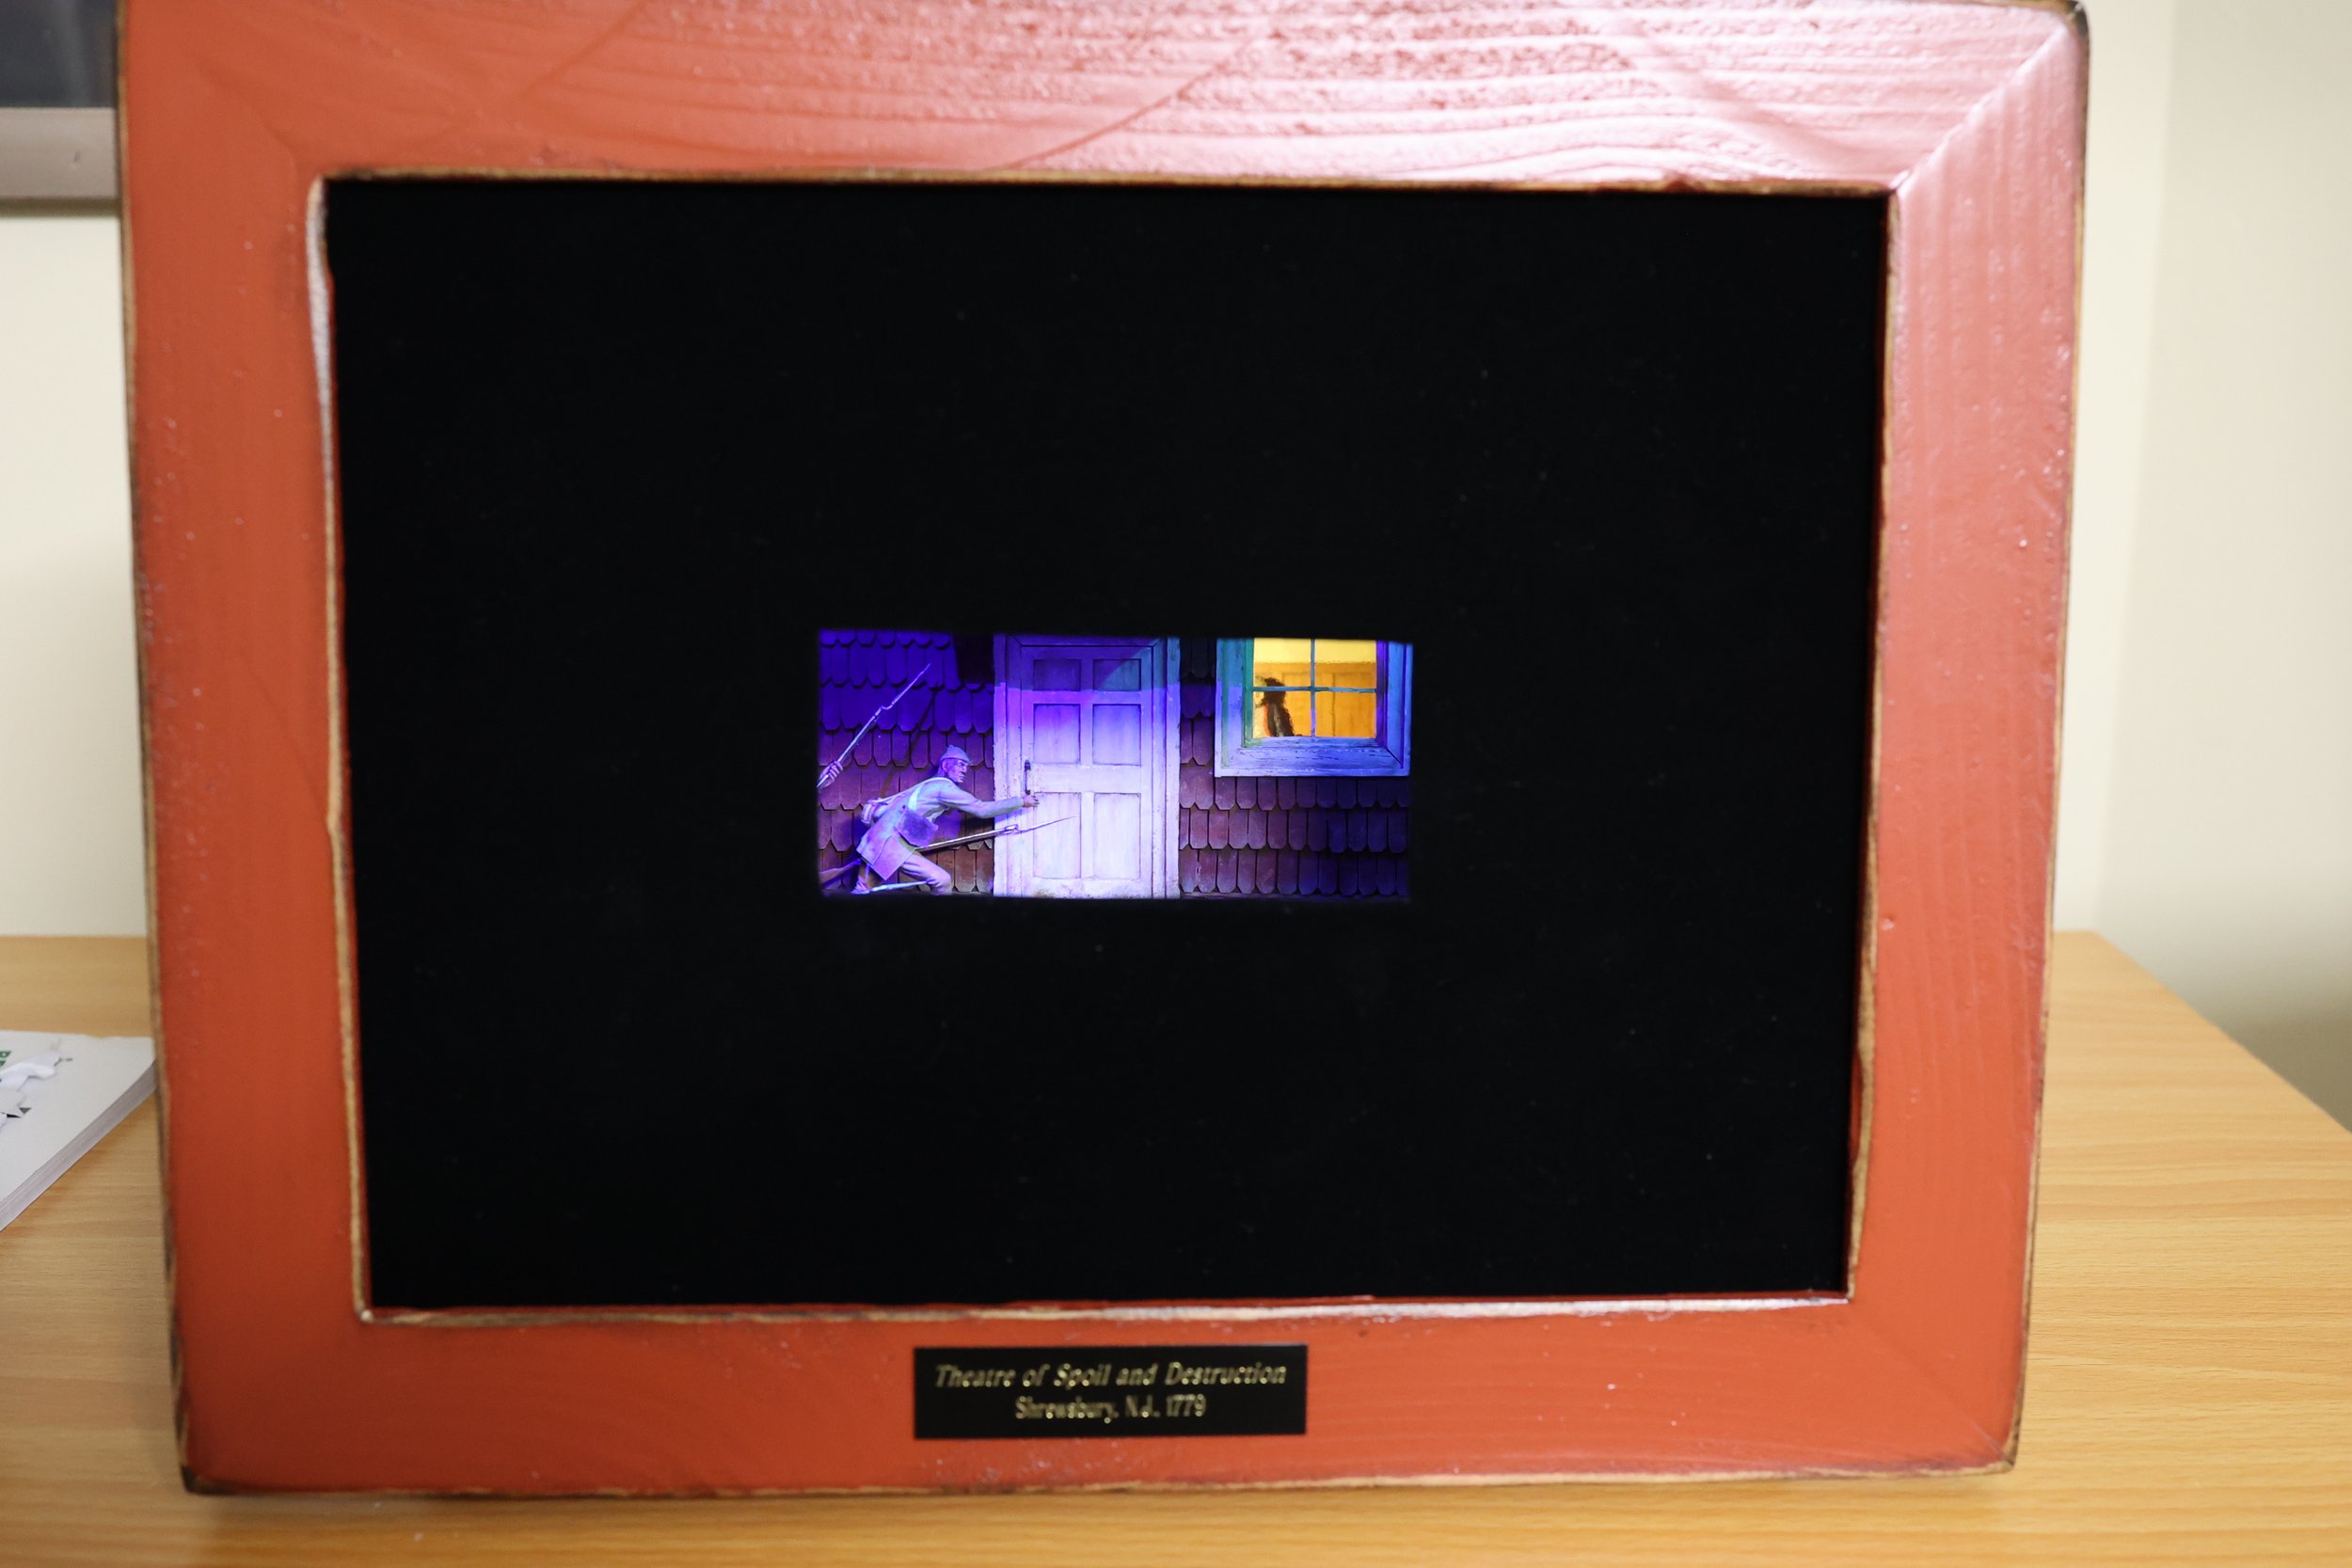
Theatre of Spoil and Destruction, Lessons Learned
After over two decades working for the U.S. Army, I’ve come to appreciate after-action reports (AAR). Having finally completed my first lighted box diorama, I thought an AAR would be far more informative than a how-to article. I am a noob after all. I screwed a lot of things up, but it’s been the most fun I’ve had with a project in recent memory. Talk about flexing your modeling muscles!
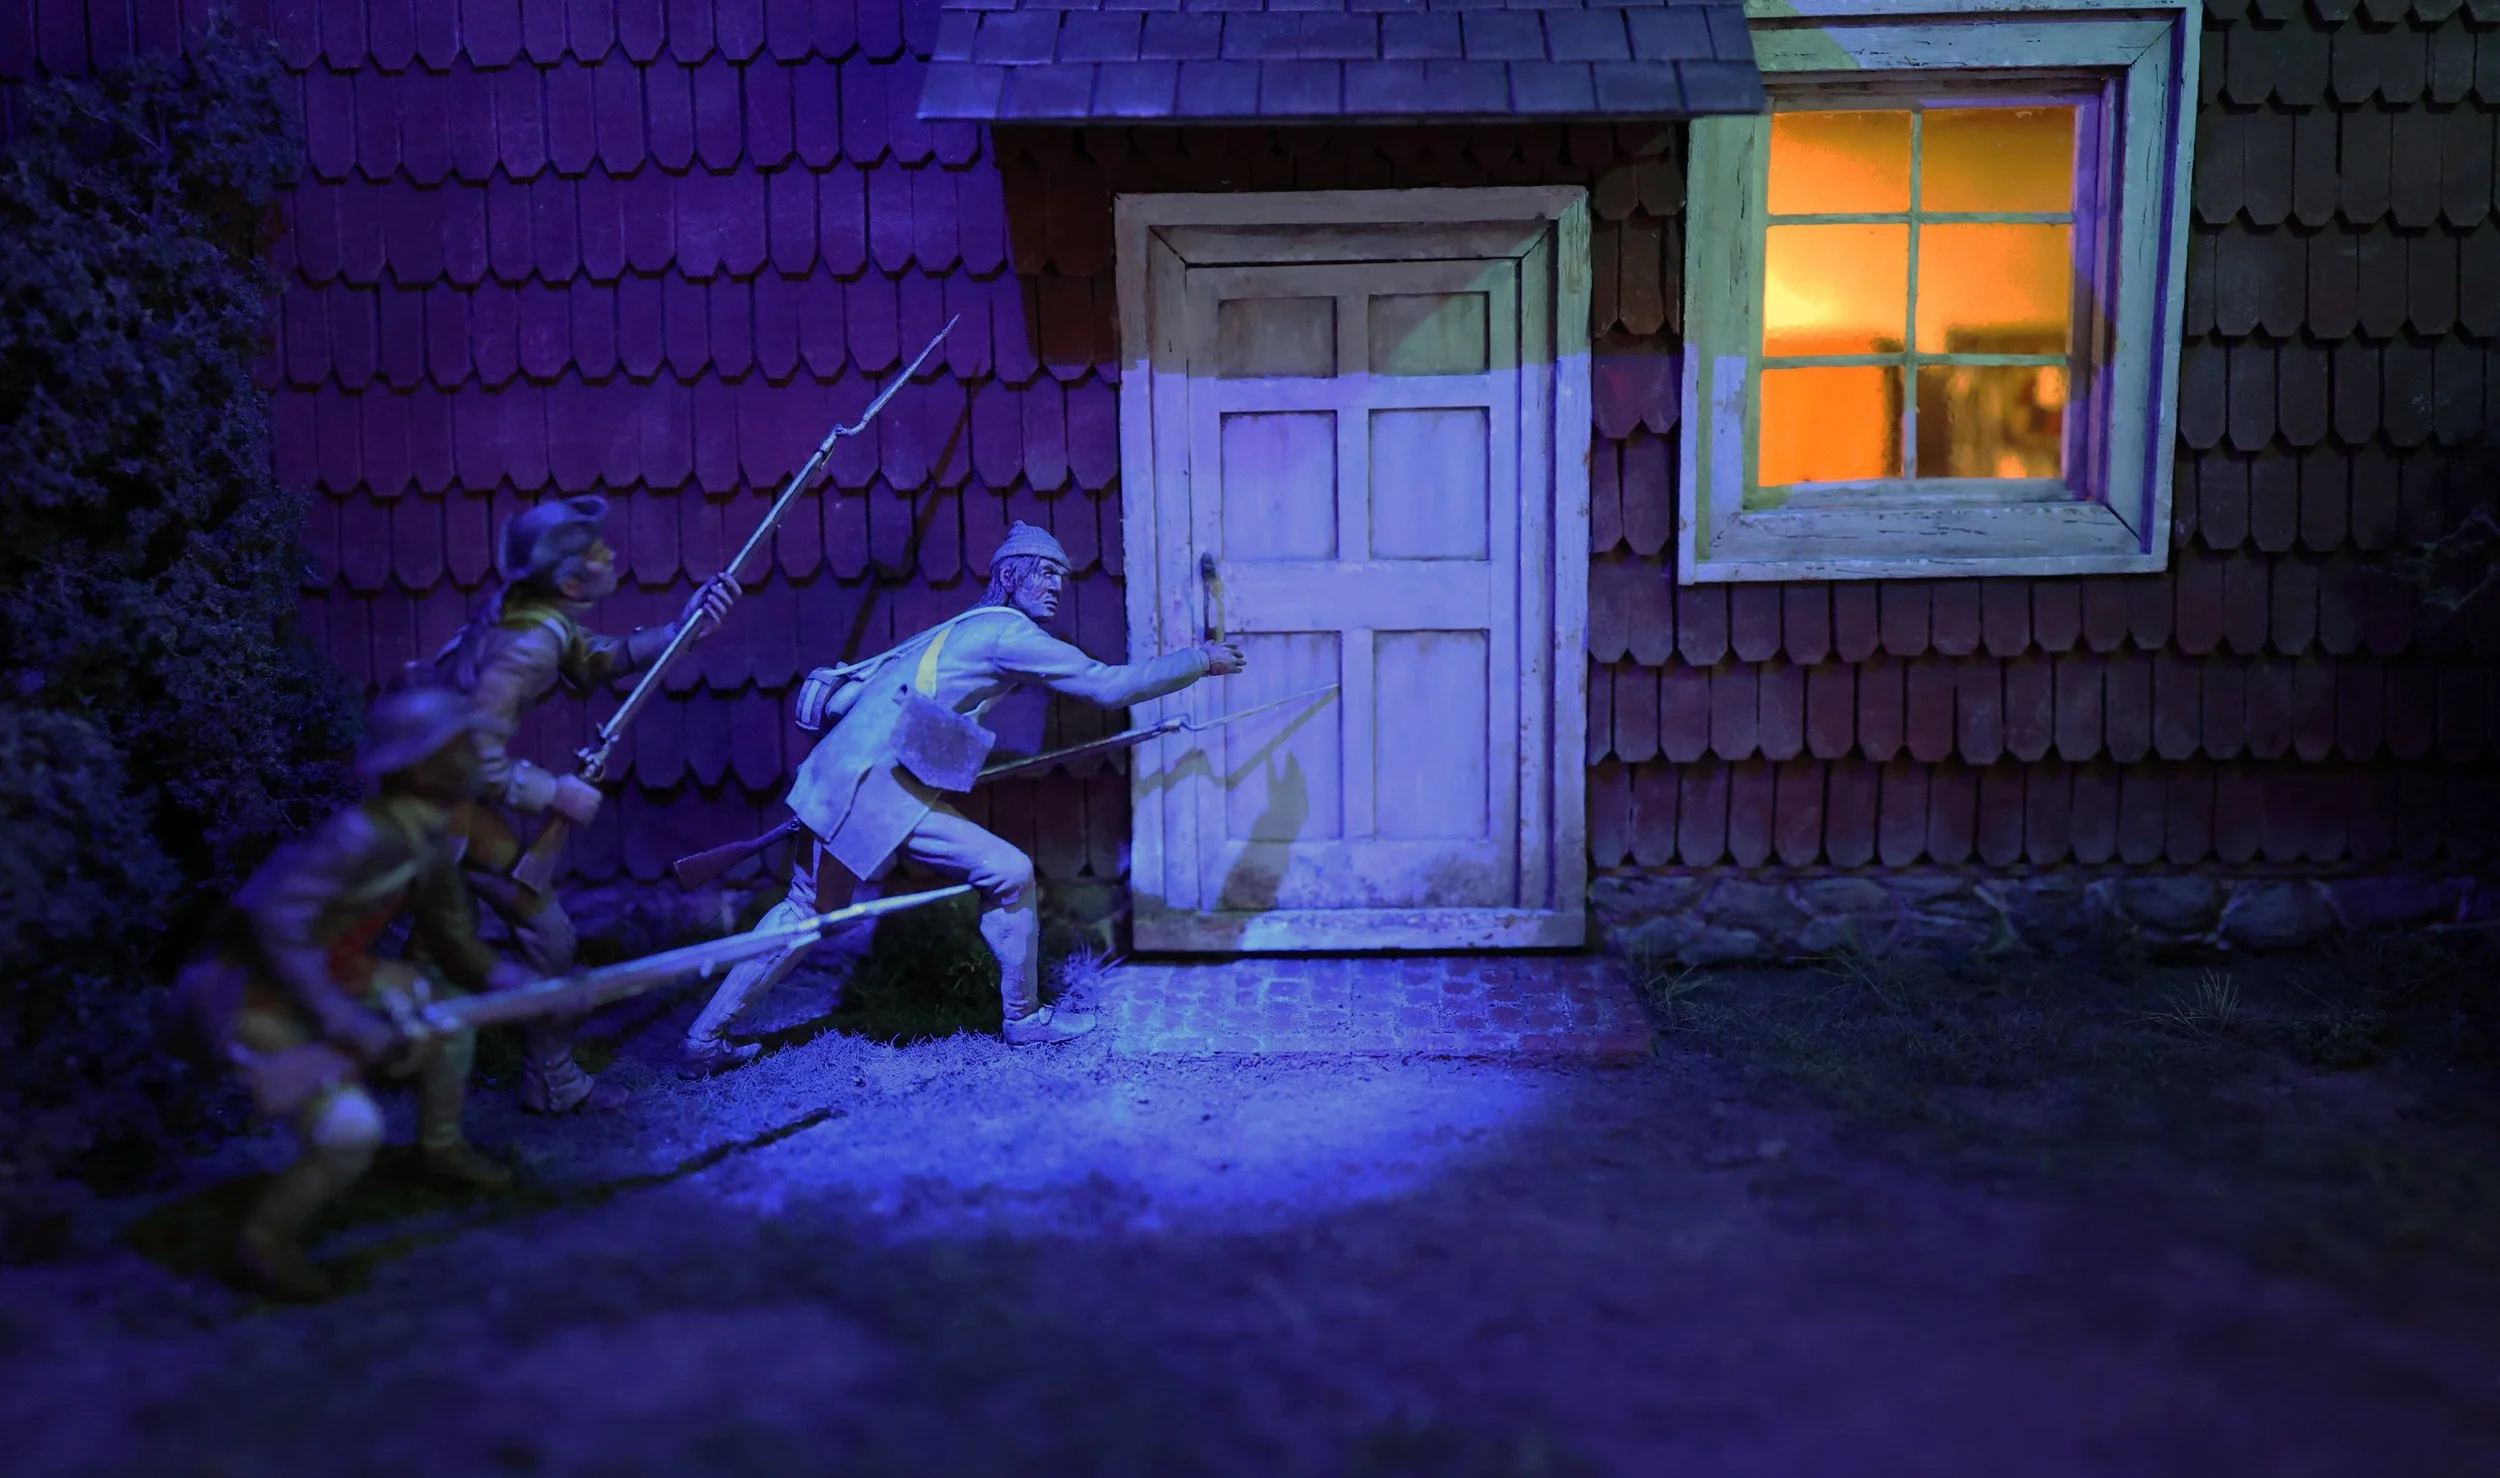
The scene I chose has been rattling around in my head since I was a kid. Set during the American Revolution in New Jersey, it depicts a loyalist raid on a tavern occupied by a small detachment of Continental soldiers. The building still stands and as kid I was shown the still blood-stained floor which resulted from the encounter. That gets your attention! In the tradition of the great illustrator Howard Pyle, I chose to depict the scene just before the action.
Mock-Ups are Your Friend
You’re going to need a lot of cardboard. Nothing went into the recycle bin until I inspected it for possible use to mock up elements of my design. Be precise in your mock ups too. My original plan was to use silhouettes inside the building to cast shadows and imply a crowded room. It looked great in my rough mock up but once the scene was put into the outer box I realized you wouldn’t see them anymore.
I don’t think that light will do what you think it will do.
Another reason to build that complete mock up… lights do not behave themselves. Adding lights is the most satisfying and the most challenging part of the process. Be prepared to move them. Then move them again. And again. And add a few more. Or, take away one. Then move them all again. I used brass wire to mount them so they could be fine-tuned. I also planned the wiring so the scene could be removed from the box without snipping wires.
Soldering Isn’t that Hard
I hadn’t planned on soldering anything. I thought I could just twist the wires together and use those heat shrink tubes to cover the connection. Trust me, much easier to solder. I got a $15 soldering set from Amazon that includes everything you need. Just worry about getting the job done. It doesn’t have to look pretty. The wiring for LEDs is pretty simple too. You really don’t need to be an electrician.
Use Dimmers!
I didn’t and I am sorry about that. When I triumphantly plopped my box down on the table at MFCA and switched it on, I was horrified to see that the abundant ambient room light completely distorted the color and intensity of my lights. It looked okay if you got close but a foot or two away and…. yikes! A dimmer could have solved that problem in seconds.
Start Simple
My scene called for two different environments: an outdoor moon-lit one and the indoor fire=lit tavern. I’m intrigued by the look of the cool light contrasted by the warm light from the tavern window. However, I constantly worried about the outdoor light exposing the inside of the box (hint: self-adhesive velvet is a life saver), painting the figures to match their lighting conditions, and light escaping the indoor set. Inside looking out would have been easier. In a final note on simplicity, try not using lights at all. My actual first box was a natural light box. I left the top open and used colored translucent plastic as a filter to alter the light color. Look ma, no wires!
Beware, This Could be Habit-Forming
That magic moment when you hit the on button for the first test (the moment right before you move the lights a million times) is intoxicating! In high school I worked on the stage crew creating sets for all of the school productions and this project took me right back to those days – which is significant considering how long ago that was!
I’d encourage every modeler to try it regardless of what you think your skill level is. If a dope from Jersey like me can do it, so can you.