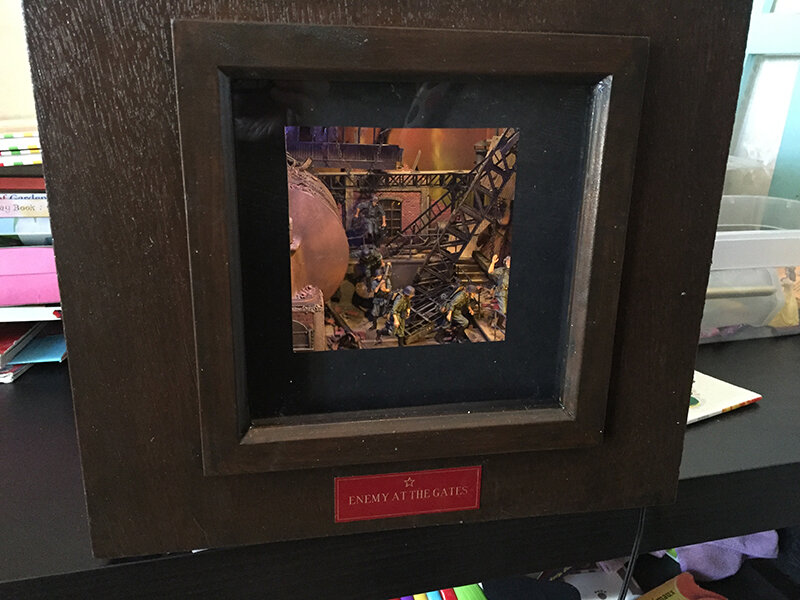
ENEMY AT THE GATES
A Boxed Diorama By Ian Duthie

INSPIRATION
I still remember picking up How to Build Dioramas by master modeller the late Sheperd Paine in the early 1980s. Materials, techniques and the sheer volume and variety of what is available have all moved on, yet this still remains one of best books ever written on the subject. This is because the importance of good ideas, sound initial planning and the art of pleasing composition will never change, and have seldom been better explained.
Perhaps the ultimate type of discipline is the boxed diorama, something for which Shep was famed.
As Shep points out, there are blessings and curses. The advantages are that you have total control of the scene, which can be built from one viewpoint only and cropped at the edges. You can also completely control the direction, intensity and colour of your lighting to create a mood.
The disadvantages are, well, you are making a boxed diorama. You will have to consider the basics of cabinet-making, lighting and circuitry, and also consider the effects of perspective.
I have always enthused about attempting this type of model, and the realisation came when I saw a fellow modeller’s eyes glaze over that I needed to do more than simply talk about it!
PLANNING, PLANNING…
As for a subject, I have always been fascinated by the battle of Stalingrad, particularly in the nightmare ruins of the massive factories. I completed a fairly ambitious factory diorama some while ago, but was always slightly disappointed in that I had let the scenic accessory factory building dictate the composition of the rest of the diorama, rather than the other way round. As Shep points out, when you make a boxed diorama you have to build from the inside outwards, and use mock-ups to see how the scene will look. Any errors in planning are much harder to correct later, far harder than with a conventional model.
It also helps if the majority of your scene is indoors, especially when beginning - outside scenes are of course possible, but blending in the sky and addressing perspective are much more difficult.
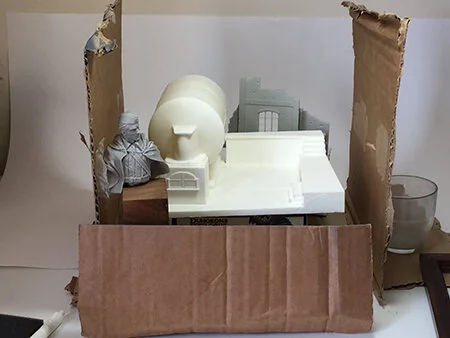
As can be seen by the mock-ups, I was initially looking at 3 layers of scale, with a small 1/72 scale building in the background, the main 1/35 factory setting, and then presiding over it all would be a 1/9 scale sniper bust. Placing smaller objects just behind larger ones to make them look further away and create a sense of depth is called “forced perspective”. As it turned out the sniper in the foreground was just too ambitious – it jarred somewhat and obscured too much of the work on the main factory component, so it is now a separate model in my collection.
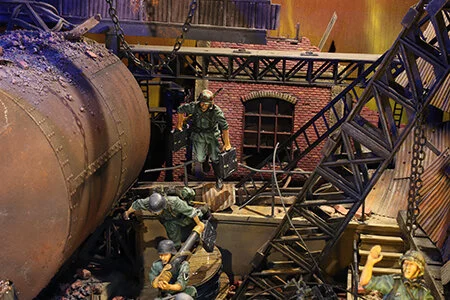
Basically the model is depicting a break-in, as a German squad surges through the wall into the shop floor in a ruined factory.
MAKING A START – SETTING THE SCENE
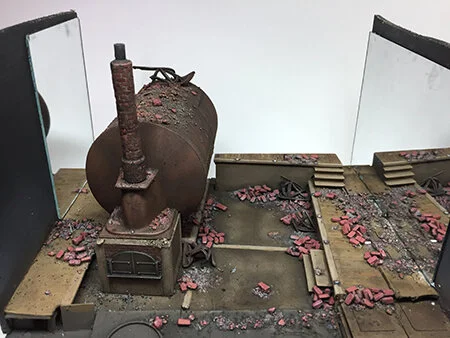
The main boiler room used to be produced by Custom Dioramics, but now has to be obtained from Masterpiece Models and imported from the U.S. It is a resin kit.
I mounted it on a self-contained plywood tray, which can be slid in and out of the main box.
Various layers of rubble and debris are scattered around the factory floors using white glue.
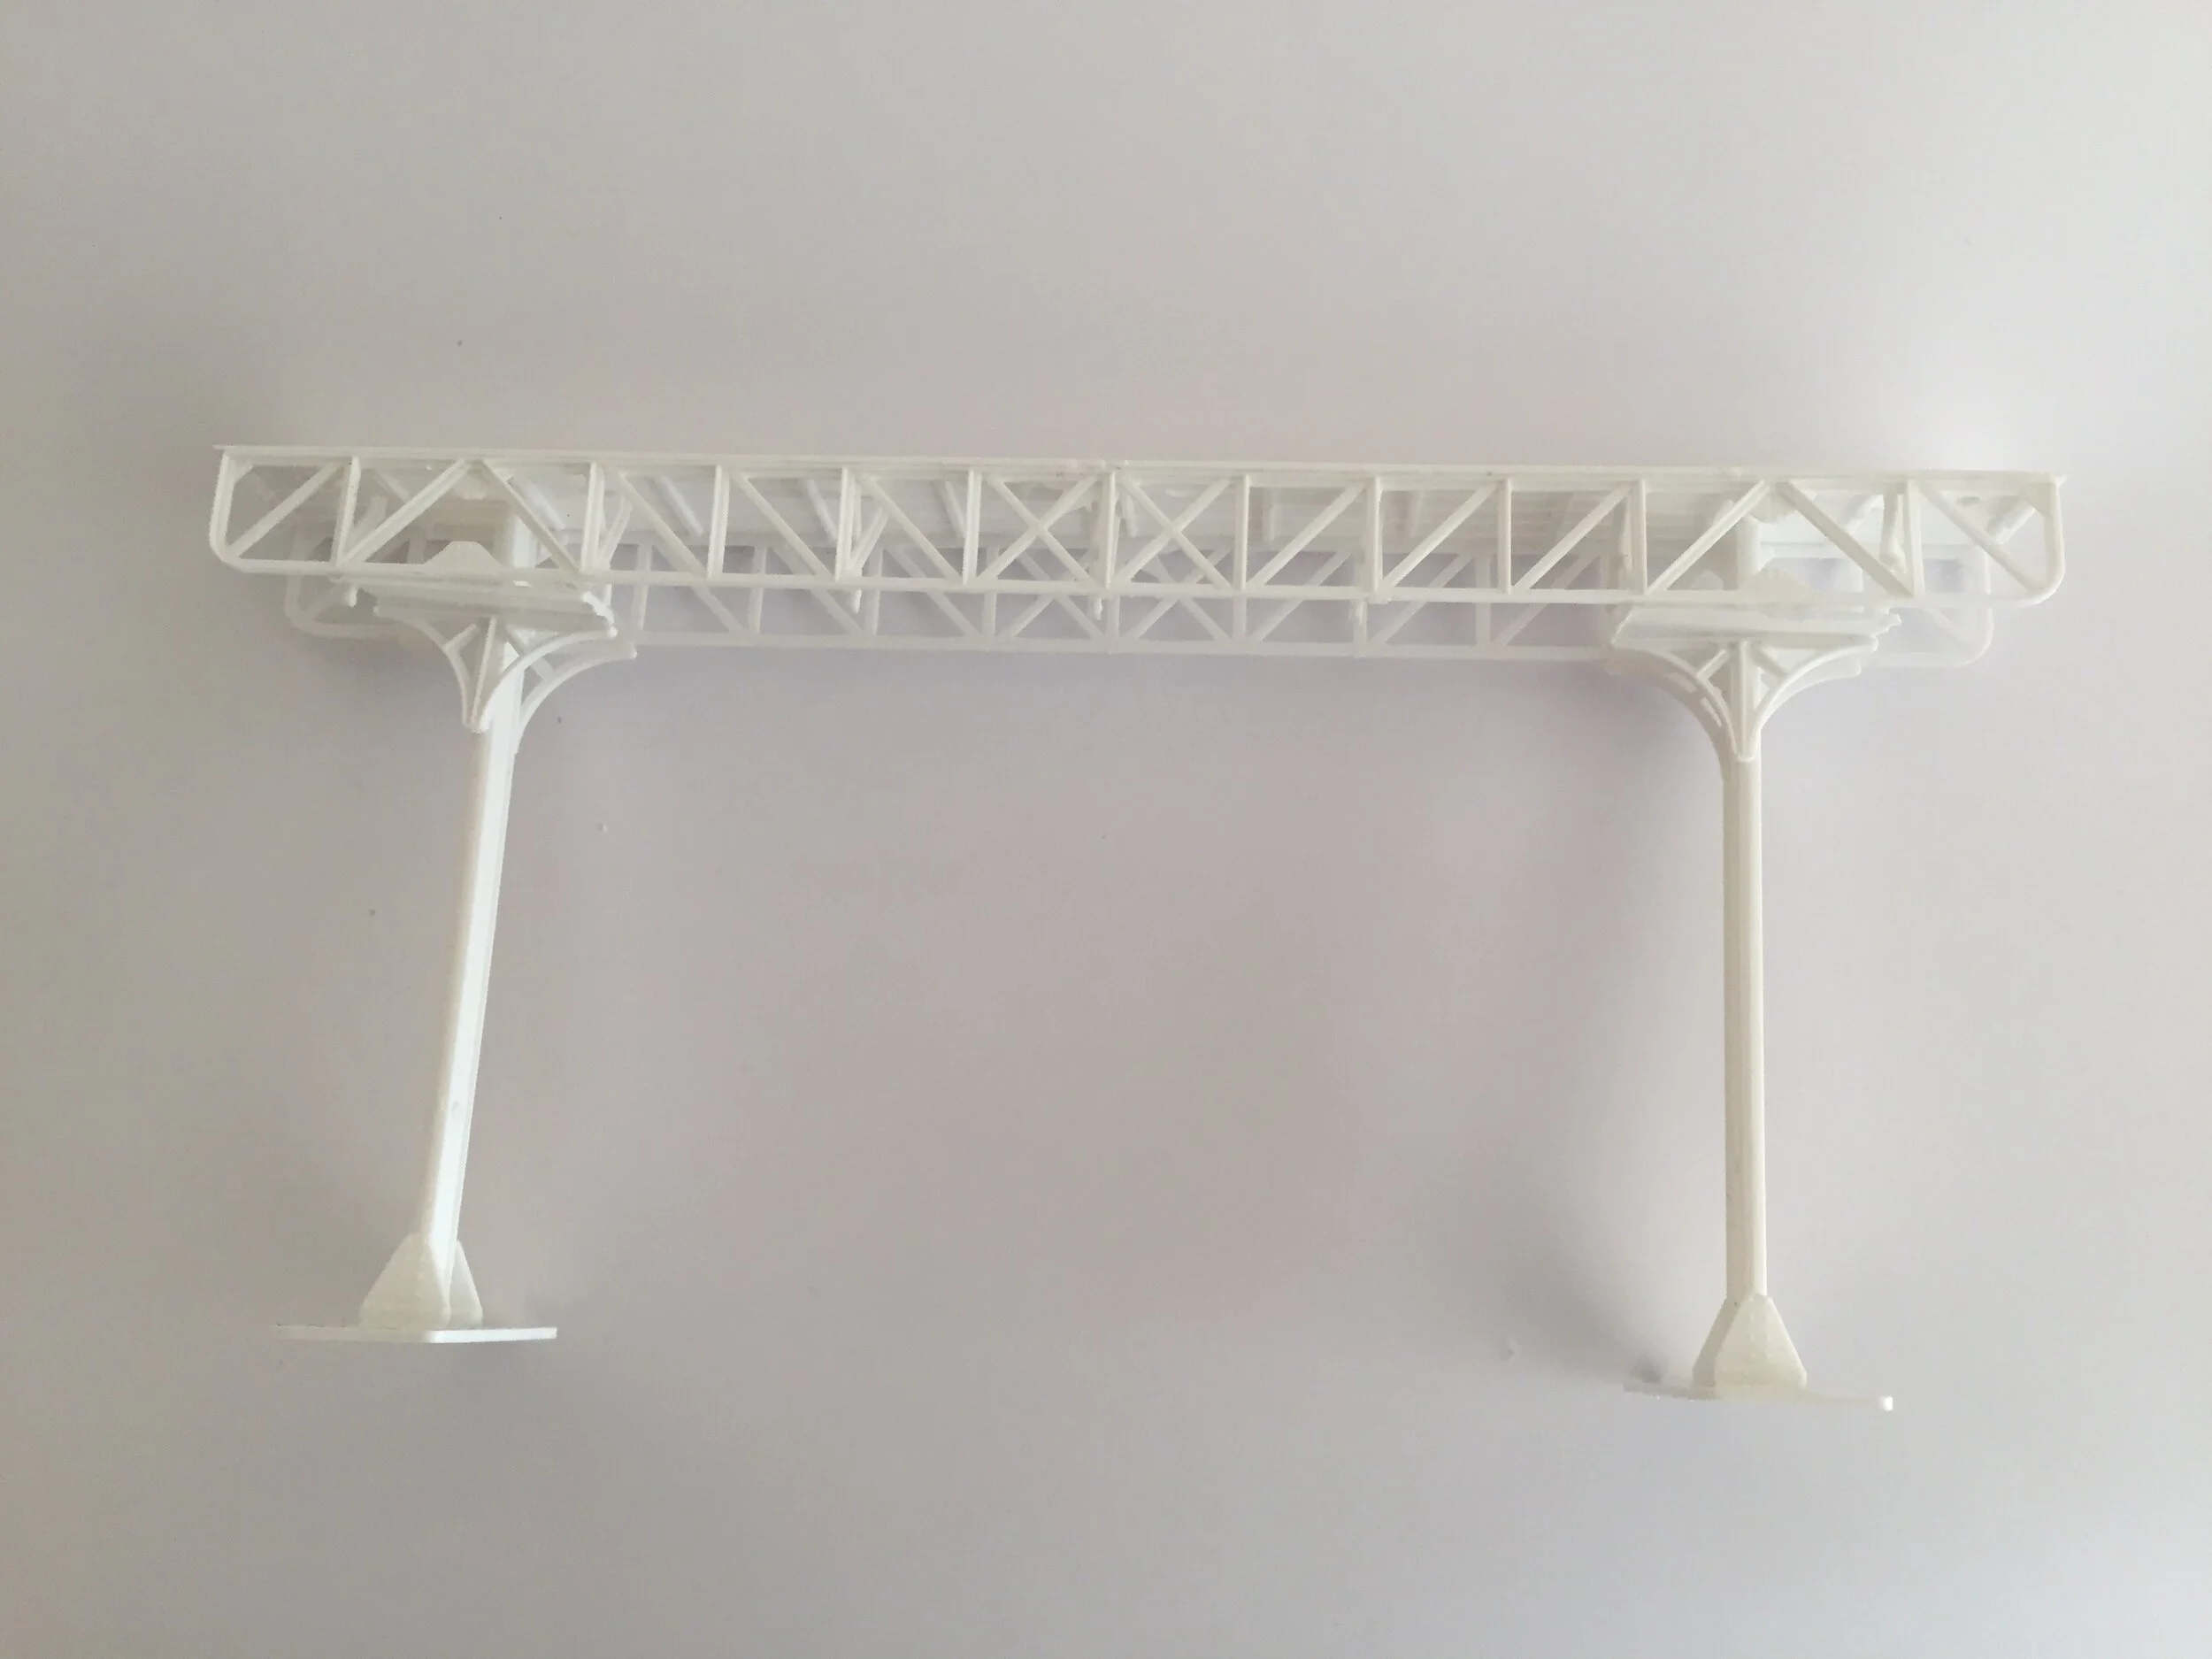
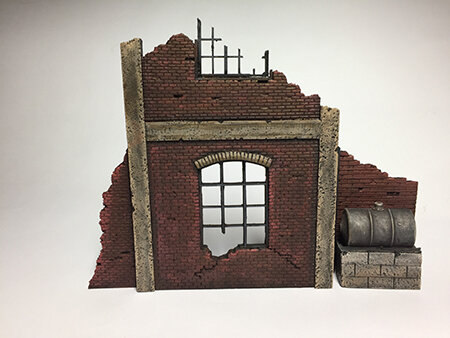
Many railway accessories particularly from the Dapol range, girder bridges and turntables etc, have their components modified to represent the industrial architecture. The main aim is to “close in” the scene. Note the use of mirrors on both sides, the event there weren’t many gaps in the ruins at the sides but where there are, then the mirrors give an impression of space beyond.
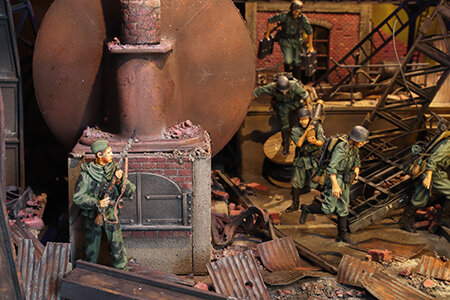
The roof girders are made from various Plastruct accessories and painted accordingly in mainly red-brown rust colours. The boiler is carefully airbrushed with a mix of red/brown/sand. It was then then thoroughly muted down with black/raw umber oil paint washes. Chipping effects were applied. One advantage of this type of scene is you can experiment with effects on the “blind” side of the boiler as this will not be seen in the finished diorama. Some modellers simply do not paint what cannot be seen, and this approach does save a bit of time with this sort of project. The walkways are painted with various shades of wood, and then a dark wash tones down the freshness, and pulls the scene together.
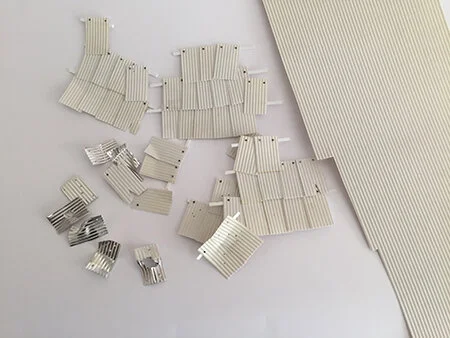
The corrugated sheet was mainly plastic, but note also some metal ones cut from an accessory sheet. You can punch some very realistic projectile damage into these. Remember to add corner holes and retaining bolts to some of your sheets. These were painted various shades of grey/dark brown, and overlaid with rust and chipping effects. The addition of pastel dust and dirt is the very final stage for all components.
The 1/72 factory façade in the background is from Dio-72 and is slid in as a separate module at the appropriate height.
The wrecked upended trolley is simply made up from a scrap model railway carriage chassis plus plastic strips.
THE CAST
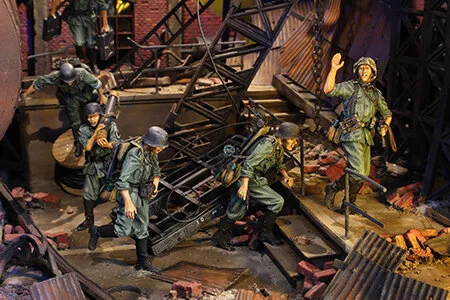
The German mortar team plus leader and ammo carrier are all from Stalingrad Models and really hang well together as a group. Close inspection shows they have between them all the components of their mortar [an 80mm Granatwerfer 34] and I even managed to find tiny dry transfers for their ammo cases. Rather than having them in single file, the levels have been varied from the ammo carrier at the top, through the intermediate guy jumping down on the cable spool [a great new accessory from Miniart] down to ground level. Also the line of running figures is veering to the right and then ascending some steps.
As a nod to my unused Vassily bust, and to add some interest, I positioned by the oven a lurking sniper from the Russian company Tank. He would let them pass, not wanting to give away his position at this range.
MAKING THE BOX
Having finished the heart of the diorama, we now have to address the casing to accommodate it.
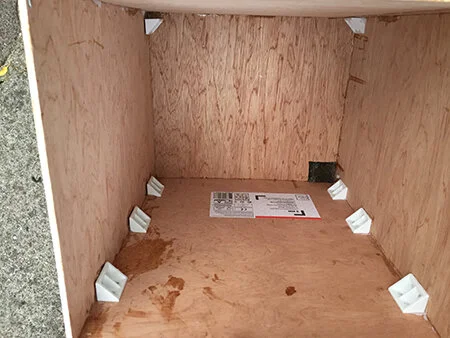
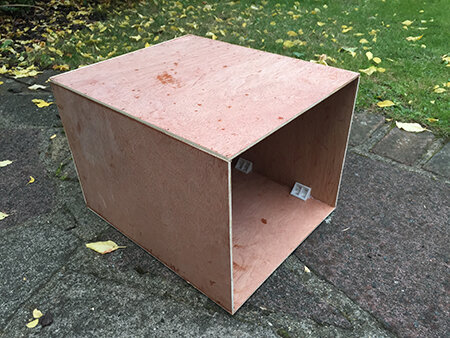
When I had decided upon the best measurements, I took them to a local branch of B and Q where they can be precisely cut on a jig [at no extra cost!] I used good quality 5mm plywood. It is important to draw out beforehand how your cube will go together in order to make the correct measurements. For example if the top and bottom sheets are placed on top of and underneath the side sheets respectively, then if the side sheets are 19cm high, then the front and back sheets will have to be 20cm high to provide flush coverage.
I used a combination of internal right-angled strengtheners, panel pins and Araldite to assemble the box. A small section was cut from the rear panel to allow for the electrical lead. The front section has to be detachable and I used wardrobe door magnets matched up at top and bottom.
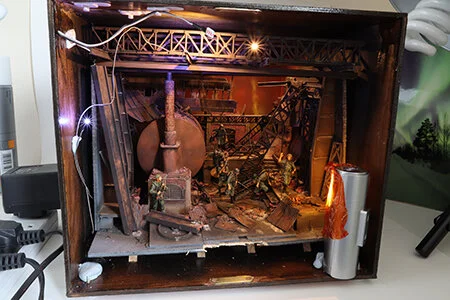
It is vital that you create the correct sized viewing aperture, and this necessitates many dry runs. I cut a section out of the front panel and inserted a deep box picture frame [Shep calls this “the reveal”] The idea of setting the viewing point deeper into the box is that you can completely set the mood with your lighting, without any interference from ambient light in the room. Also you can conceal controls and lighting to the side. Note how I have framed the scene further by using black card to precisely control what can be seen.
LIGHTS, ACTION
On now to the lighting effects, and although the principles are the same, the technicalities are very different. Shep’s advice was to assemble your collection of wires, filament bulbs, resistors etc. then “smell for burning” when switching on for the first time! Modern LED sets come virtually pre-assembled and with different colours, with no knowledge of circuitry required and no generation of heat or possibility of electrocution. I used a module from Woodland Scenics which has 4 lights attached, each with its own dimmer. Further modules can be added if required. Foolishly I accommodated it at the rear of my box, which means you have to slide out the main diorama to adjust the settings, then reinsert it to see how it looks. See what I mean about planning.
The scene still needed more light, and most boxed dioramas have the main light at the front hidden alongside the reveal. In the end I used a battery operated LED night light front right. Shep was not a fan of coloured bulbs, and the reddish cast light is produced by masking with a cellophane sweet wrapper. LED bulbs use very little energy, and I would now recommend using battery-operated lighting completely. I have found out the hard way that electrical sockets are not always conveniently placed at model shows, and of course I needed a conversion plug at the SMC Show in Europe.
Regardless of power source there has always been a problem with a frontal light source and forced perspective. This is because the small and large scale objects are so close together. In this case the shadow of the ammo carrier projects full size on to the tiny factory in the background, completely ruining the illusion of distance. This was solved by placing one of the 4 general lights directly above at the rear, and this kills the shadow.
FINISHING TOUCHES
The red flaring sky backdrop at the back of the box is simply airbrushed on.
I finished the box with dark varnish then a gloss coat, and it looks fairly neat. I am no cabinet maker but it doesn’t have to be a masterpiece. As Shep said, if people keep asking you detailed questions about the cabinet construction, then there is clearly a problem with your model!
Of course, no project can be regarded as complete until it has a suitable Name-It plate affixed…
Well that’s my first shot at a boxed diorama – a steep learning curve and plenty of mistakes, but generally I’m pretty happy with the result and feel that some of the chaos and drama of the factory battles have been captured. I’ve got the taste and have some further ideas on the back burner.
I cannot recommend Shep Paine’s book highly enough, as it is just about the only one out there to this day which explains and illustrates this fascinating aspect of our hobby.
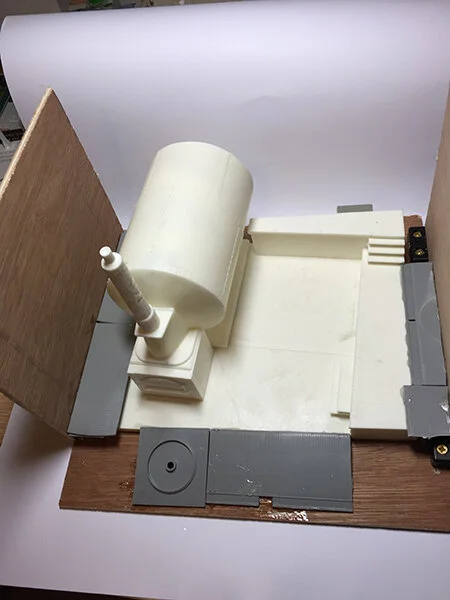
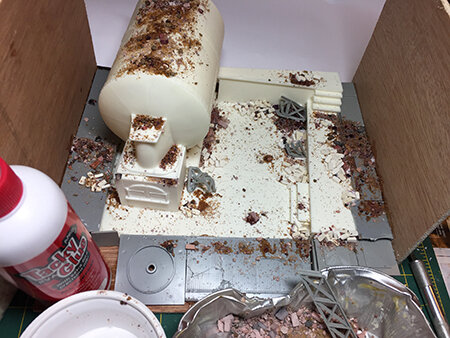
Initial planning and dimensional estimates, and rubble laid down with white glue.
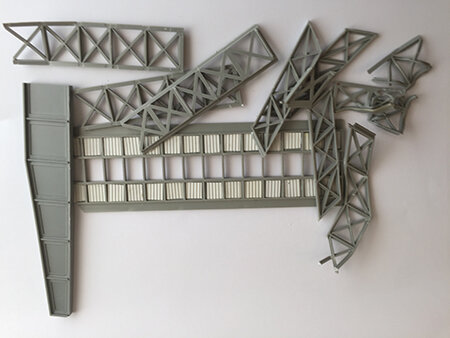
Corrugated sheet and battle damage, roof girder, and undercoat with grey primer.
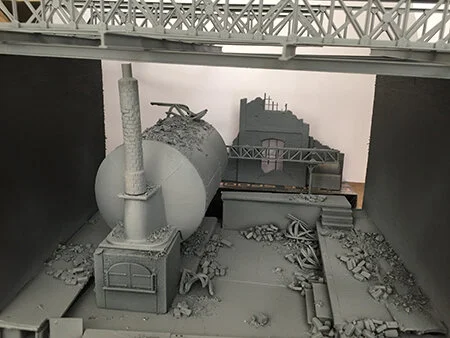

The scene is coming together and the painting is underway.
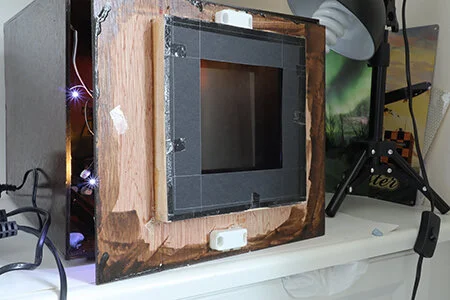
The cabinet and the front removed; note main light with cellophane wrapper.
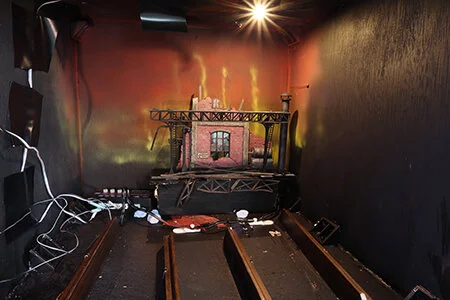
The mirrors and the lighting.
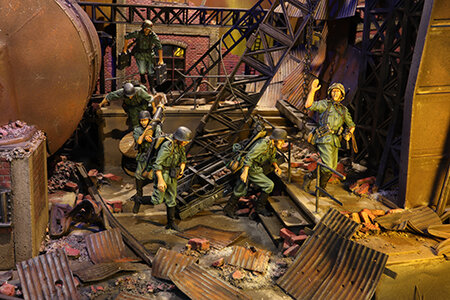
Detail views (above) and the finished box (below).