
“GASSED”
By Jon Harbuck
In 1918, the British government enlisted John Singer Sargent to visit the Western Front as a war artist. Sargent’s reputation was for painting the rich and famous, so the bureaucracy may have assumed his work would glorify the war effort. The painting he actually delivered – soldiers blinded by mustard gas, stumbling to an aid station among a sea of other wounded, traces of poison gas still hovering in the sky – may have shocked them. I think it’s his masterpiece.
Paying tribute to the painting had long been an ambition, but the complexity of the thing is daunting. However, Greg DiFranco’s “Madame Récamier” flat in a natural light box (stunning) and his step-by-step tutorial on this website (comprehensive) got me thinking. Flat figures in various scales, mounted in a natural light shadow box, with overhead light to replicate the back-lit scene in the painting, offered a chance to present it in miniature. But the figures would have to be one-offs and I’m no DiFranco, so it posed a long-term project.
Covid, and its related cancellations, offered the opportunity. Starting from a good-quality photocopy of the painting, my legal assistant reduced it on the copier to 1/35 scale (for the stumbling figures) then gave me 20 copies in black and white. From these I cut out individual figures (and groups) to mount on plastic card. Each mounted cut-out served as a “rough-draft flat.” It was only a matter of sculpting the photocopied contours onto each cut-out (Aves putty) to produce the figures. Tedious, though not especially challenging.
I started building the outer box early on, since the groups of figures would need to fit inside just-so. Greg’s article stresses tilting this type of box backward, to enable overhead light to fully illuminate the interior. Mine is tall but not very deep, so for stability I decided to build this box upright but tilt the scene backward. Both the figure elements and the painted backdrop lean about 30 degrees away from the viewer, and the outer frame mounts do as well.
Sargent’s painting is essentially a landscape. The figures closest to the viewer are painted in warm vivid colors, while more-distant figure groups are successively greyed-out. Replicating this depth of field (on canvas or in miniature) requires the most saturated (i.e., color-intense) mixes for the near groups, and successively desaturated (greyed-out) mixes for each group further off in the distance. To help get the depth right I decided to underpaint each group in grey scale. I underpainted with acrylics, to lessen the risk of lifting the undercoat with the oils to come. Also, my rough transitions from shadow to highlight (acrylic paint does not like me much) would not be as apparent after color had been added.
Once satisfied that my greys created sufficient depth, I added color. I painted in oil glazes, testing my color mixes against a good copy of the painting, checking each group (near to distant) for the transitions from saturated to desaturated color. As I painted the groups I painted the backdrop also, to make sure my horizon and distant elements would line up with the figure groups. Finally, test-fitting the elements into the box, checking light and shadow effects with an overhead lamp, and repeating as necessary until the painting was complete.
This is not intended to be a “how-to” on natural light boxes – Greg’s tutorial does that already. Rather, I hope to have demonstrated that for certain subjects the natural light box medium is ideal. For this subject, I think it was.

The file of stumbling soldiers under construction: Aves putty over paper cutouts on plastic card. Rifles (from a commercial kit) were sanded thin on the back sides, and the flat figures were joined together into groups.
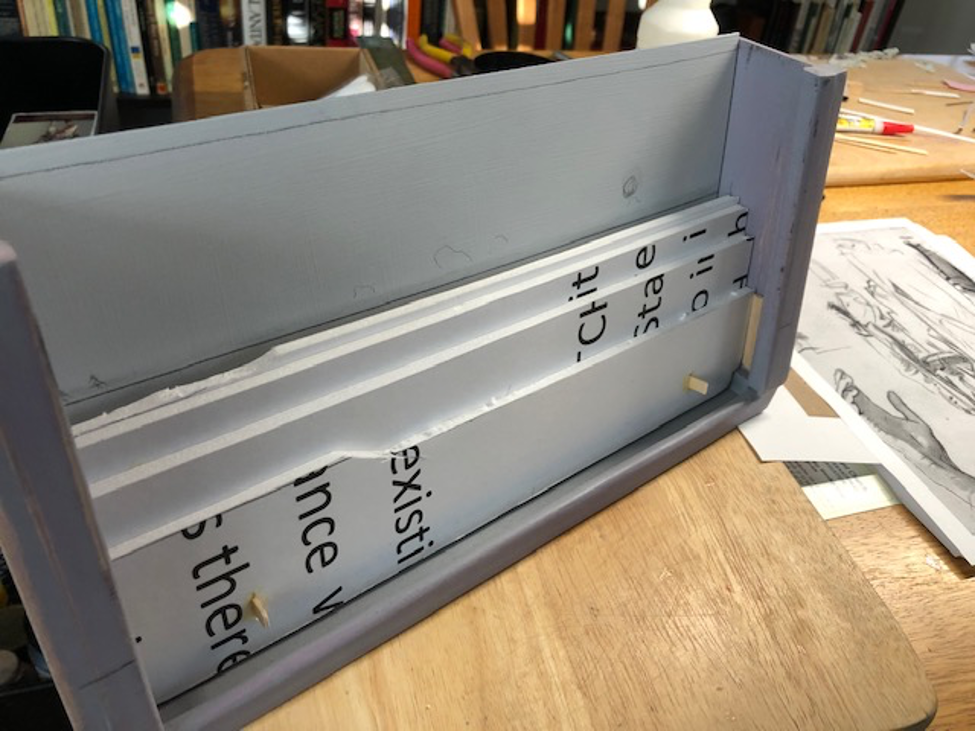
The outer box in progress. Sheets of foam board were used to mount each rank and file of figures in the scene, attached together as one unit. Both backdrop and mounts tilt backward, to maximize overhead illumination.

Grey-scale undercoat begun. “Groundwork” is bond paper stiffened with acrylic matte medium, then textured with a mixture of Plastic Wood (a hardware store item) and matte medium.

Grey-scale undercoats in progress, while test fitting the various elements into the outer box. Some figure groups had to be raised or lowered a bit, while others needed shifting right or left – using foam board for the mounts made this relatively easy.
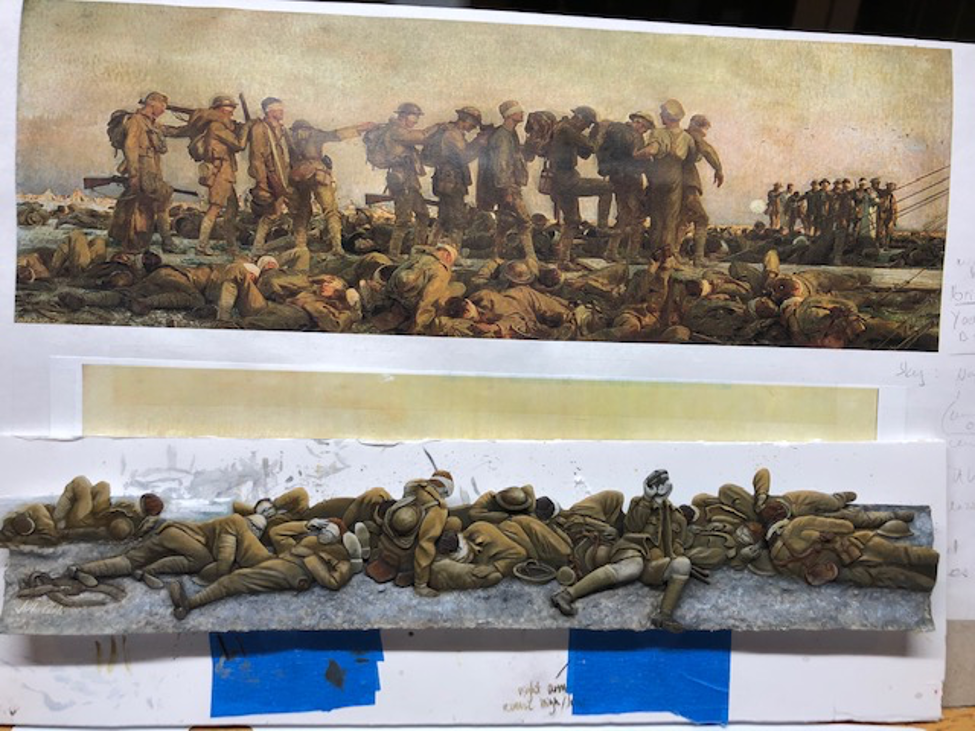
Applying color with oil glazes. Reference photos of the painting were critical to getting accurate color mixes, as well as proper color saturation.
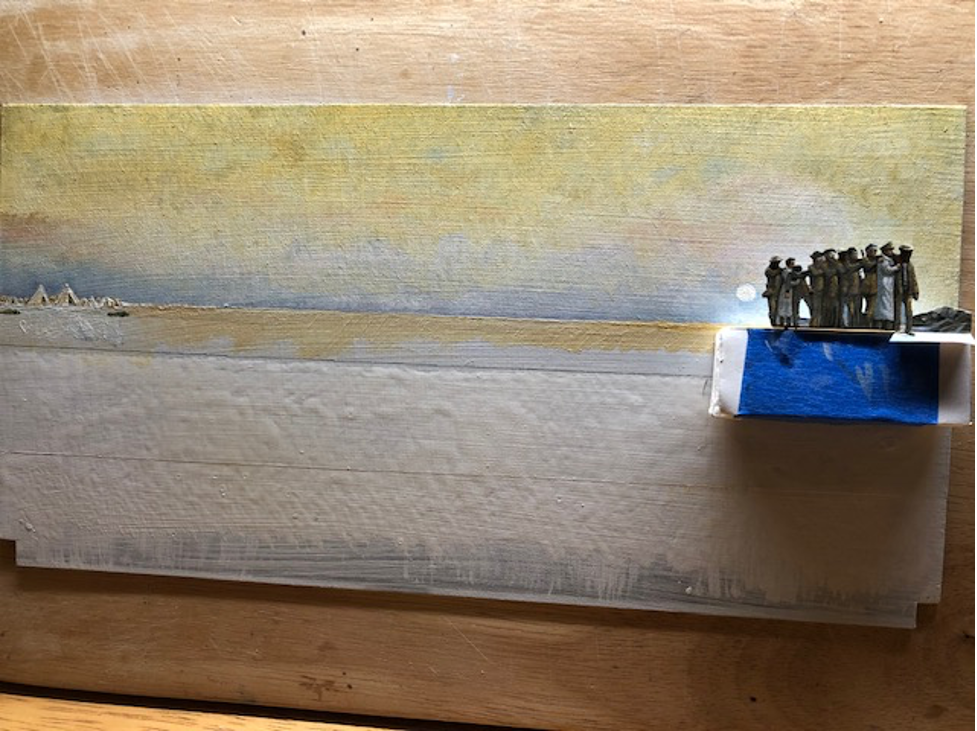
Painting the backdrop with the sky and horizon. The position of the setting sun relative to the various groups of figures needed some adjustment. Here I have stuck the distant group of figures onto the backdrop card with painter’s tape.
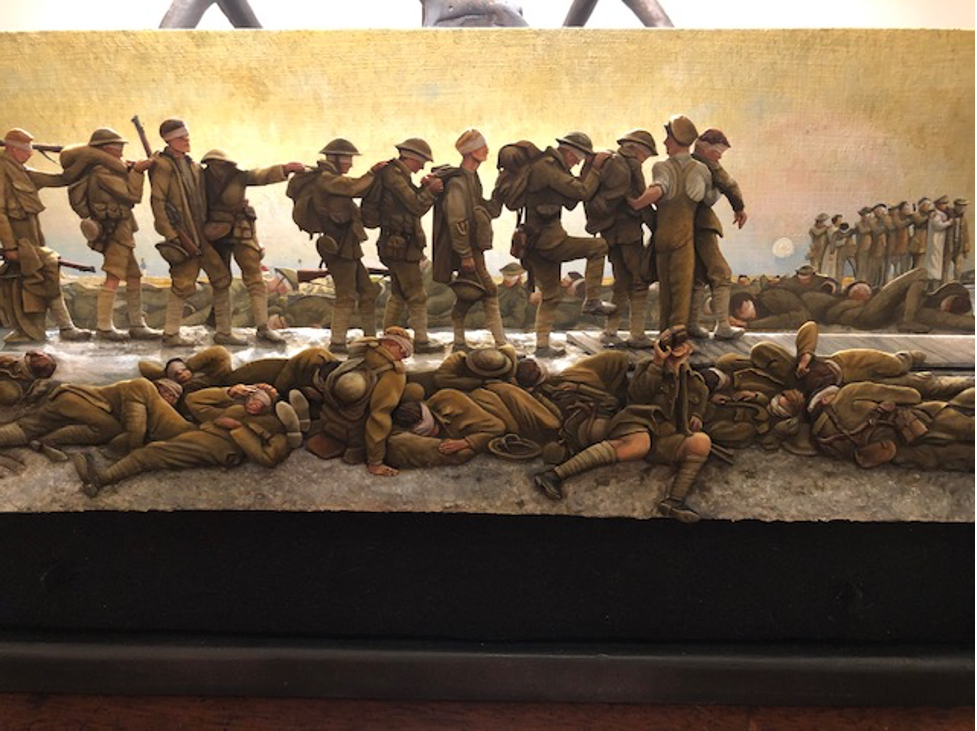
I used an overhead lamp to check the light effect as painting progressed. The way the sunlight falls on the figures is a key element of the painting, and I had to adjust highlights and shadows over and over.