Step by Step:
The Cutting-Out Expedition
By Jim DeRogatis
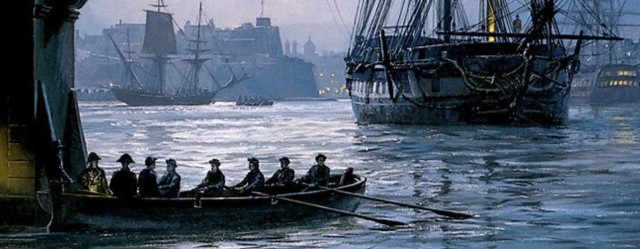
Celebrated for its dominance of the seas throughout the Napoleonic era, the British fleet was indeed adept at set-piece battles between ships of the line. But it did just as much damage and captured many more prized with its dreaded “cutting-out expeditions”—nighttime guerilla raids by ship’s boats on smaller, minimally armed warships or enemy merchantmen like the French victim depicted in this diorama.
This box started with me really wanting to do something based on the Historex/Nemrod ship’s boat model, a really nice resin casting, to which I added a lot of extra detailing. Shep Paine suggested the idea of a cutting-out expedition, and subsequent research turned up many a dramatic tale of this brand of naval derring-do during the Napoleonic wars. The two illustrations that follow were particularly inspiring.

As always, I started with some rudimentary planning, this time with the boat and some temporary Historex figures, trying to keep the scene as tight as possible and the viewing window as large as possible. I planned from the start to use mirrors to extend the hull of the larger ship that’s being boarded, but the smaller ship’s boat had to be positioned “just so” in order to avoid it being seen in the mirrors, too.


Work progresses on the hull, the ship’s boat, and lighting experiments.


By this point, I’ve roughed out stick figures of most of the sailors and marines, and welded together the brass-rod “ratlines” at the right of the scene. I only needed to do half of one ratline, as the other half would be reflected in the mirror. (Same with the cannon on the left.)


Sculpting of the figures progresses.


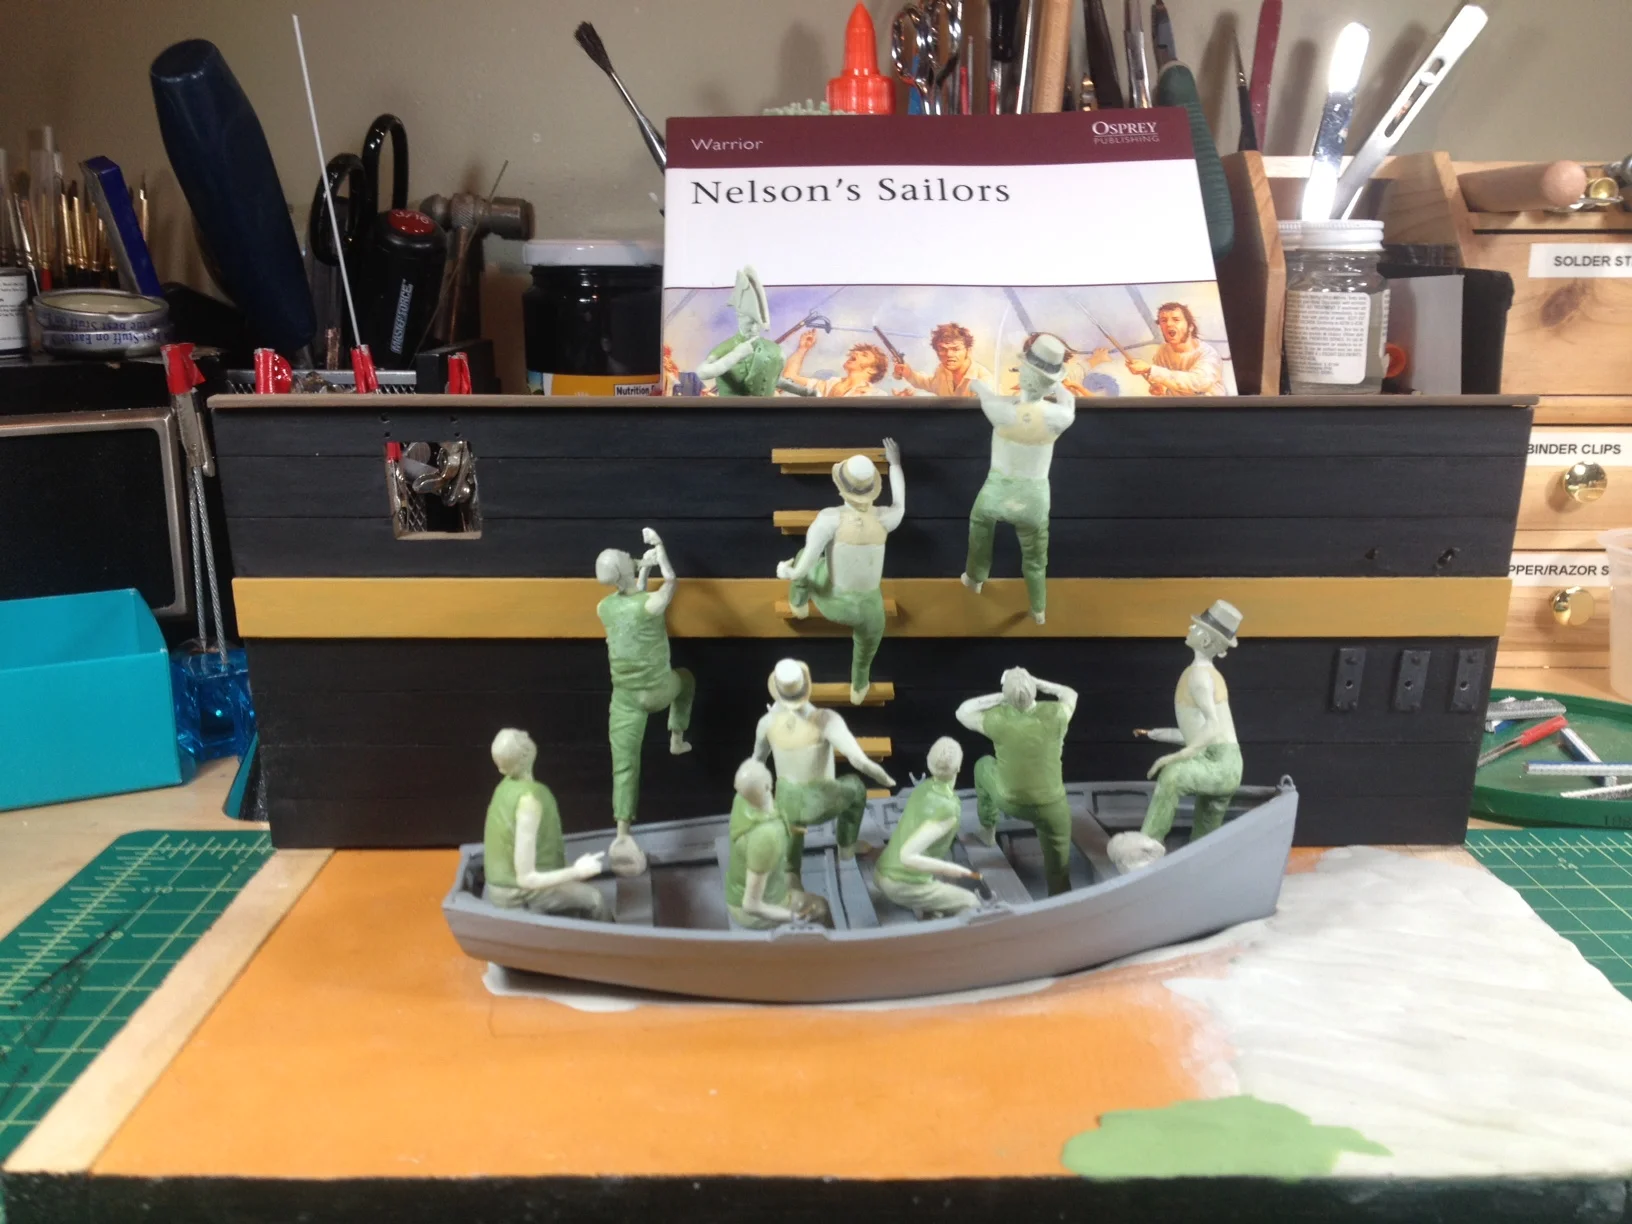

Sculpting “the ocean” out of Aves Apoxie Scult; it will be finished with several goats of high gloss after it’s painted and the ship’s boat is permanently set in place.
Painting has begun on the finished figures, and I’m trying to paint as much as possible for the light in the box. I’m learning that this is key, as you can finish a figure the way you would if it was freestanding, and then have it look all wrong in the finished box diorama. As you can see by the third shot below, I was going for a “triangle” shape to the layout of the figures, with the eye starting at the left with the helmsman, climbing up to the apex of the officer on deck, then coming down to the figures on the right in the bow of the ship’s boat.

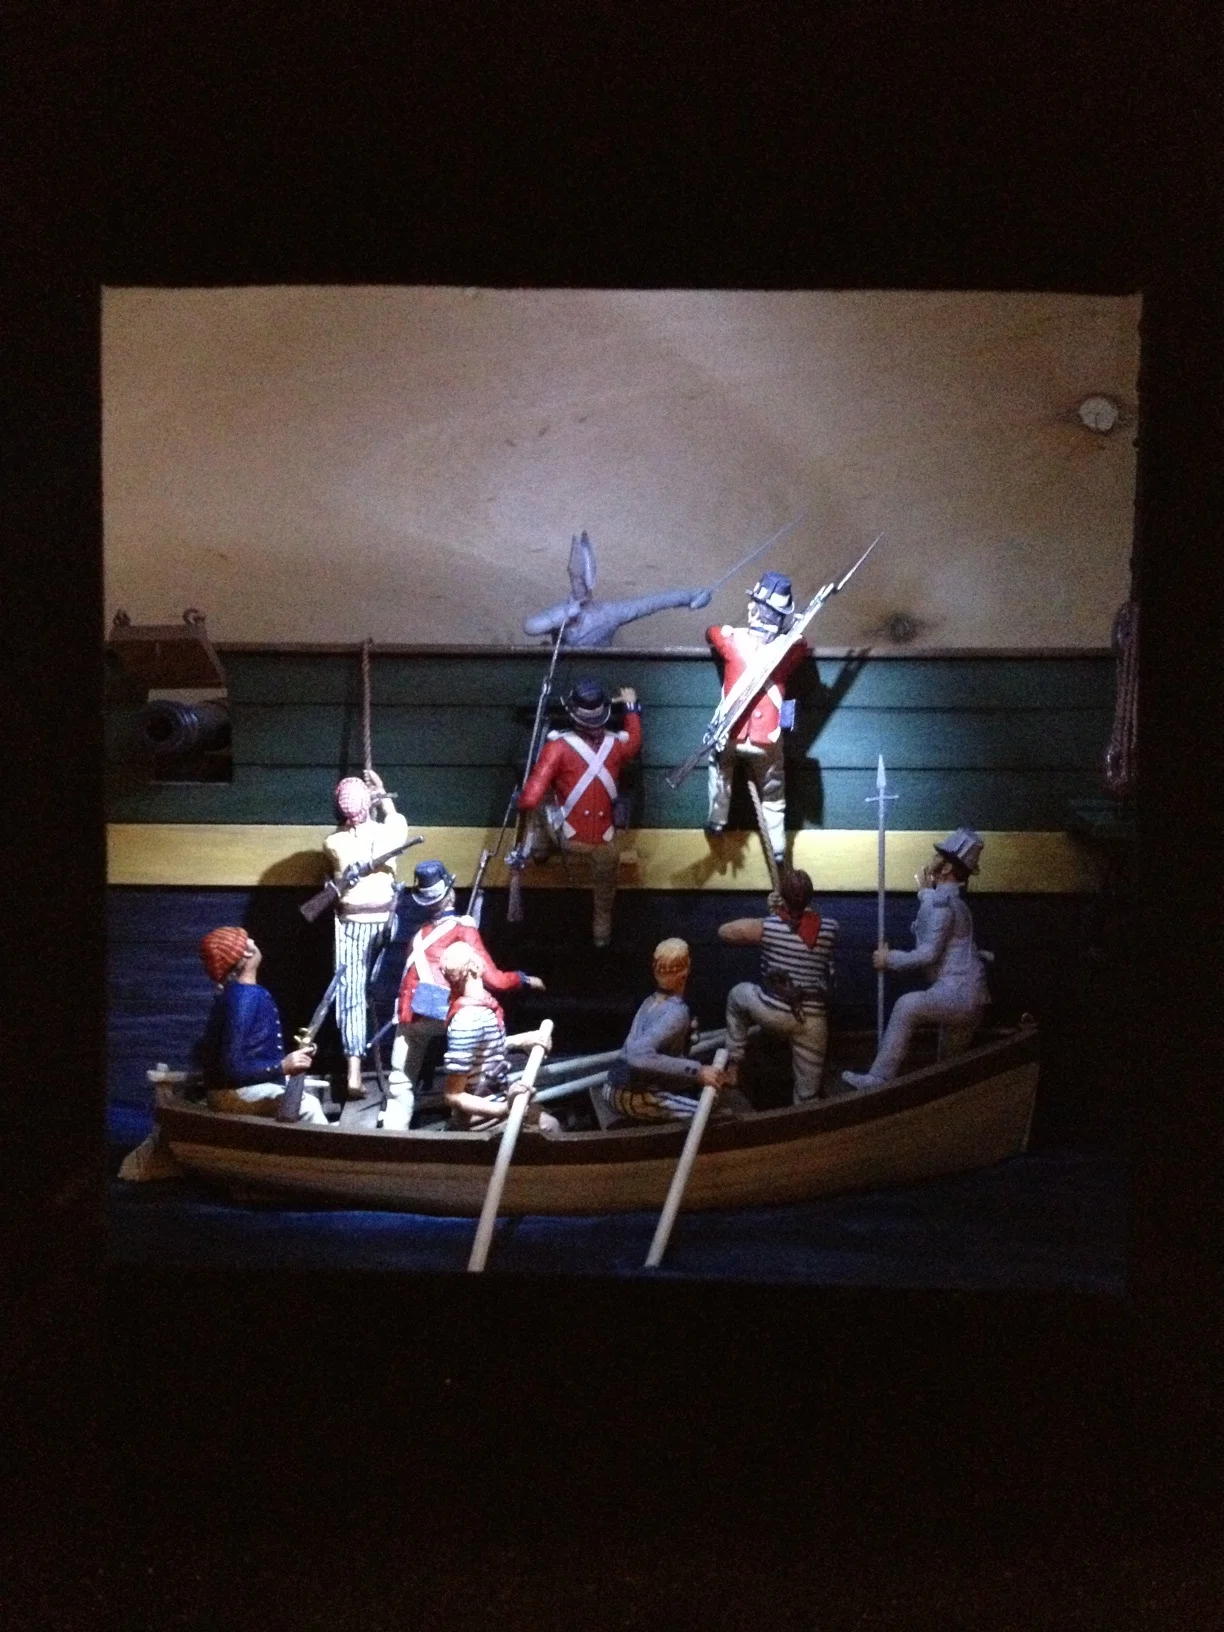

Two shots of the reveal for the finished box, with the LED spotlights in place on the back.


The inner tray of the diorama.
By this point, I’d gotten some feedback from the boys at the MMSI, chief among them Joe Berton, who thought I needed some hint of a structure behind the officer on deck to indicate more of the ship behind him. I fashioned these rudimentary “ship shapes” and painted them dark gray; they mostly disappear in the finished box, but you can sense that there’s something there, which is all that I needed or wanted, the rest fading into the black velvet “night.” (I subsequently abandoned the idea of the French flag.)
This shot gives a good indication of what’s going on with the acrylic mirrors on the left and right.
Another shot of the finished diorama. I don’t think this one was entirely successful when I showed it at MFCA in May 2013; the lighting that looked great at home sort of washed everything out in the exhibition hall, if the dimmer was turned up, and didn’t do enough to illuminate or add drama to the scene, if the dimmer was turned down. I brought the box back to the workbench and played around again a lot with the lighting, painting some of the LEDs to get different effects, and swapping others out. The result now looks a lot more effective regardless of the room light, as hopefully will be seen when I bring the piece to the MMSI Show in October 2013.